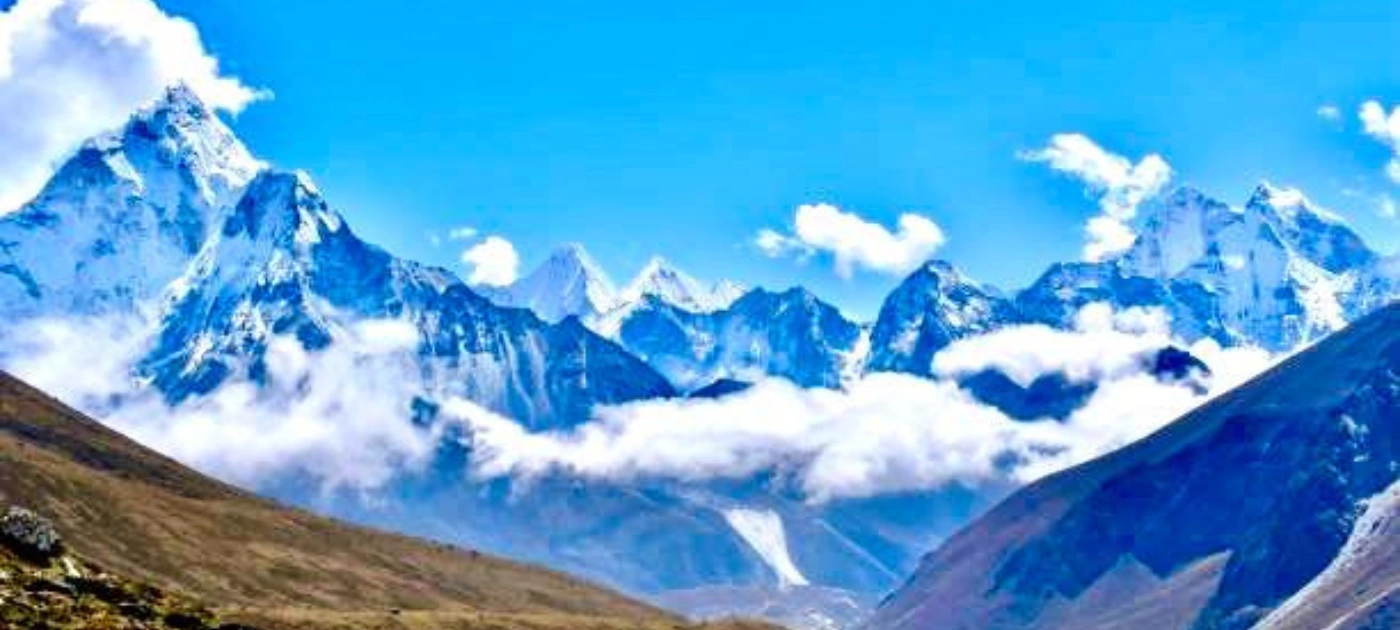
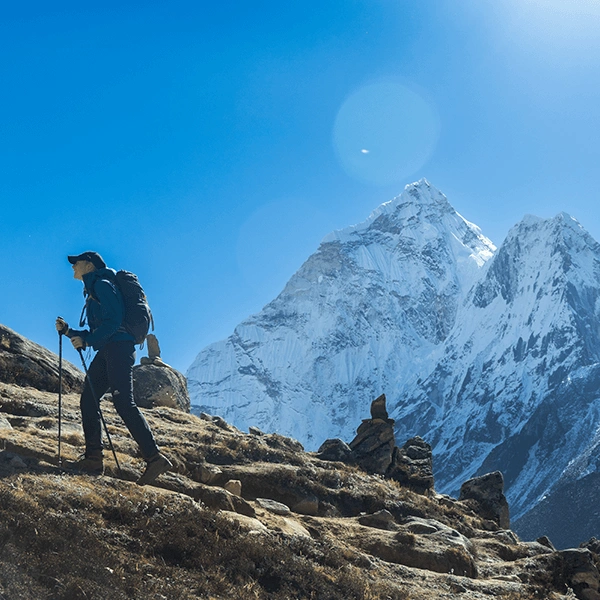
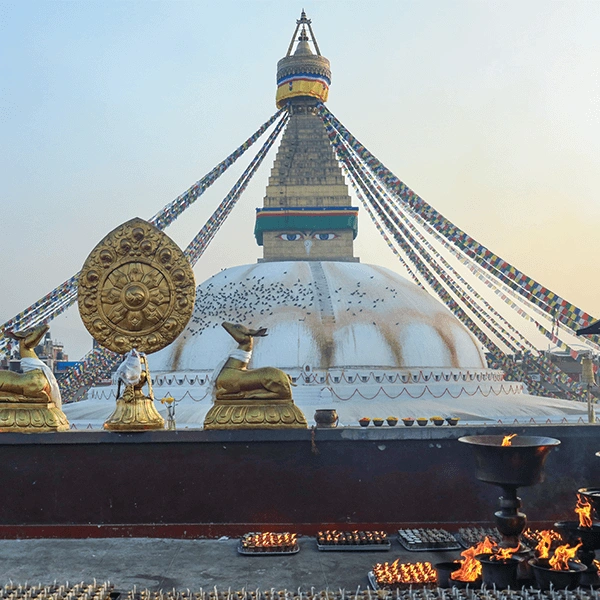
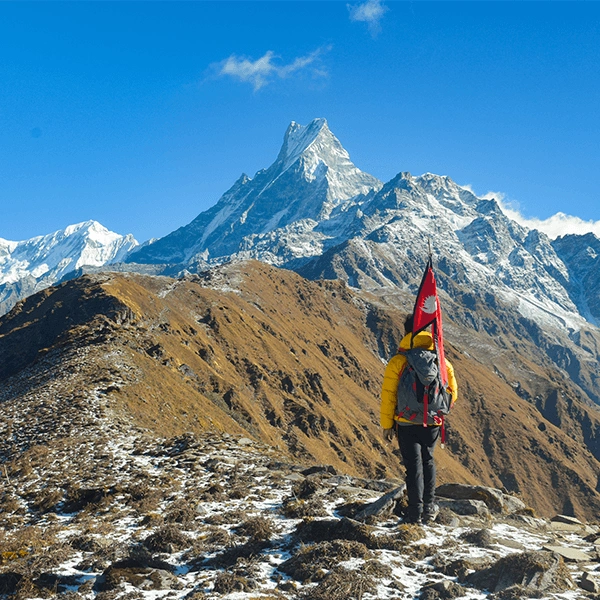
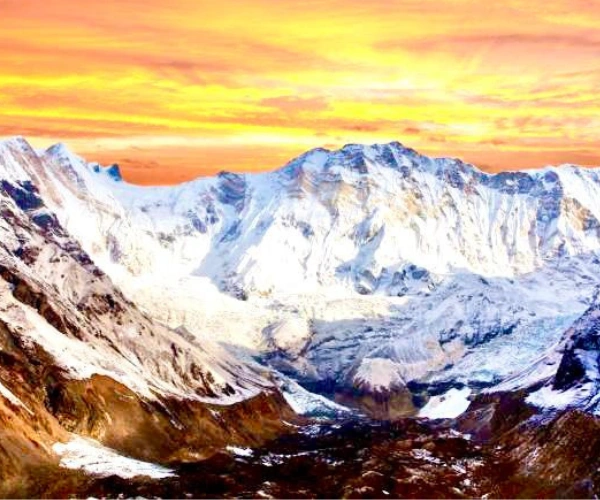
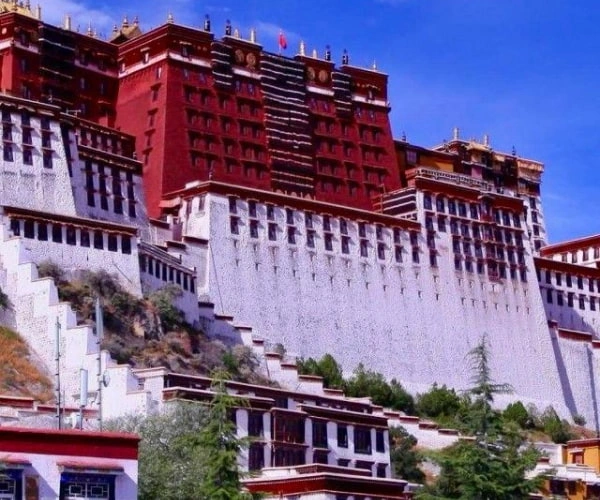
Overview of the Everest Base Camp Trek
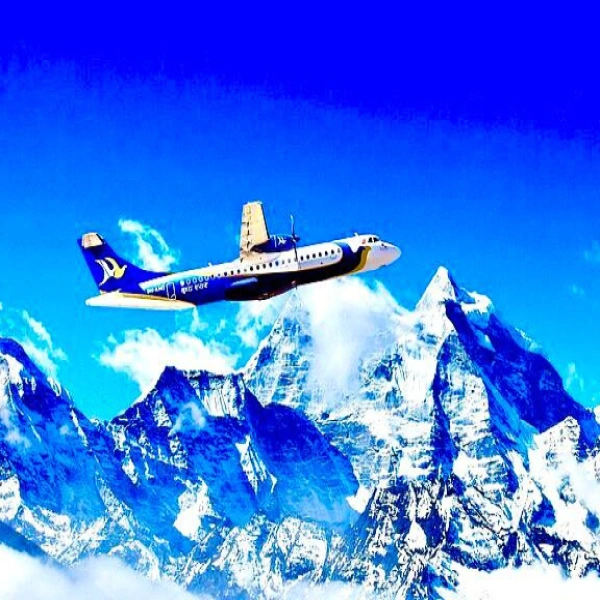
The Everest Base Camp trek is among the world's most renowned trekking itineraries. It commences with a brief flight to Lukla (altitude 2,860 m) and a serpentine drive inside the Sagarmatha National Park, finally arriving at the base camp of the Mount Everest trek, the highest mountain in the world (8,849 m).
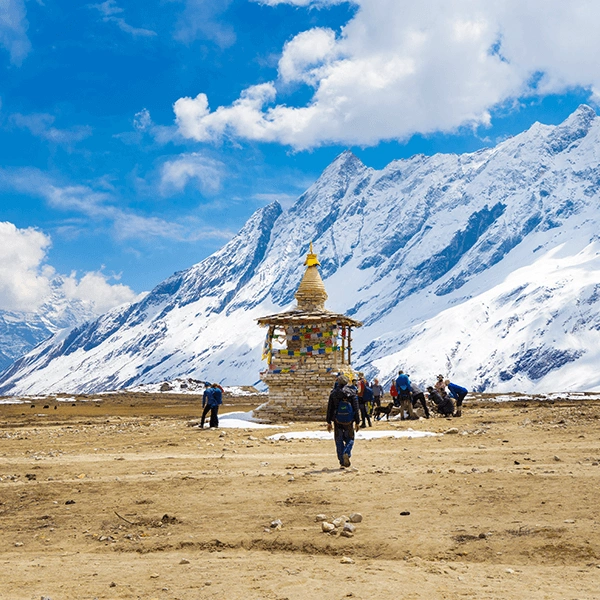
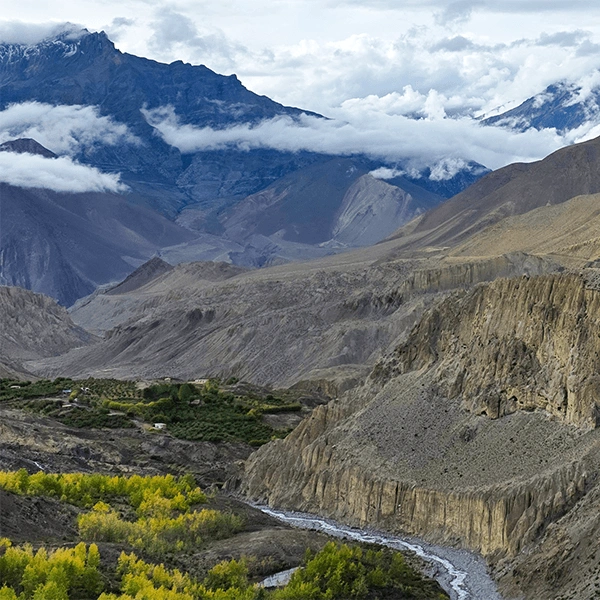
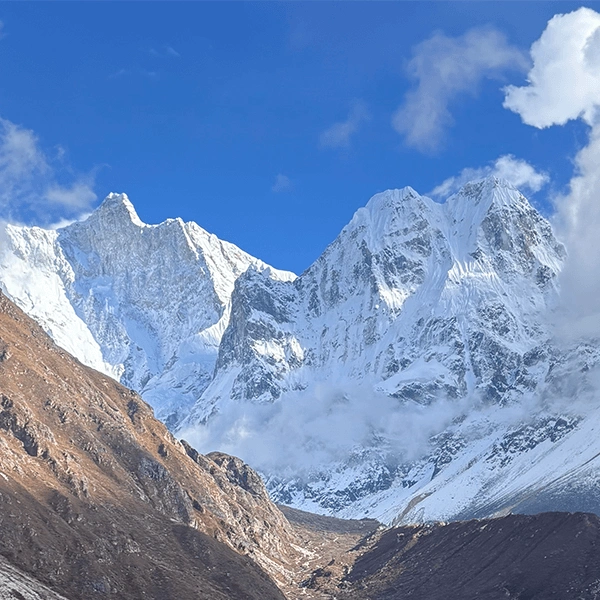
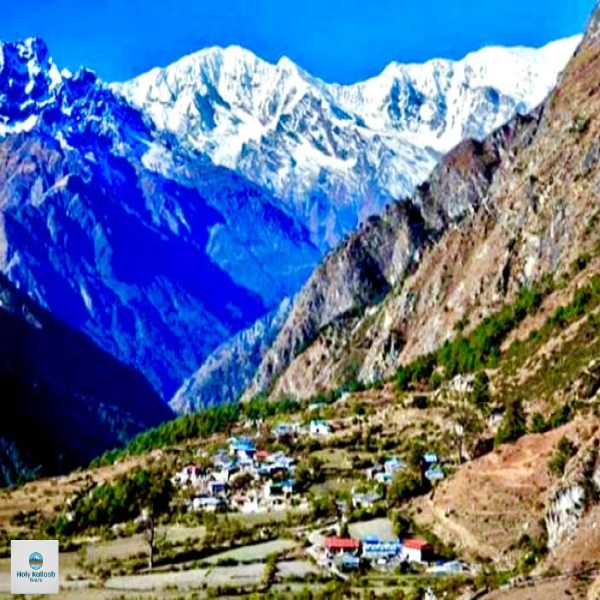
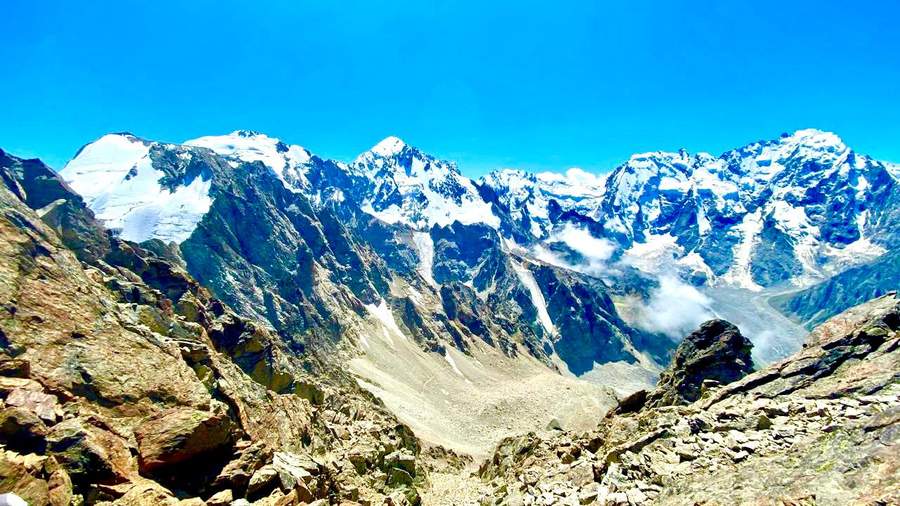
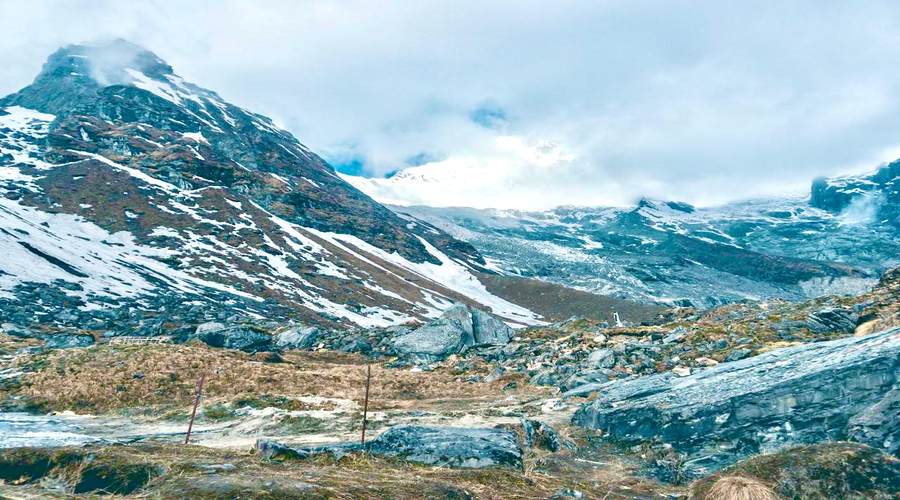
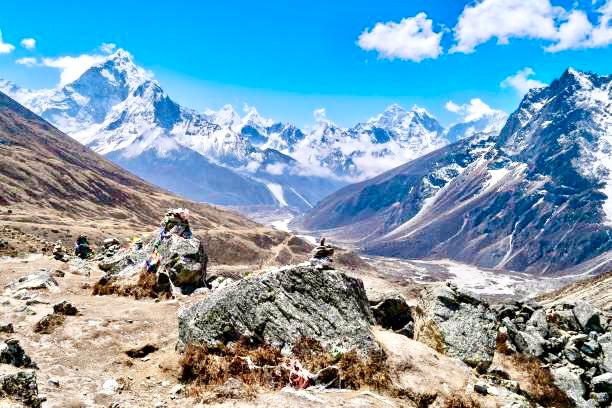
Usually, the trek lasts 12 to 16 days, during which approximately 130 kilometers of the trail are covered. In the course of your journey, you will go to Sherpa settlements, ancient monasteries, thick rhododendron and pine woodlands, glacial moraines, and some of the most striking mountain landscapes of the Earth.
Key facts at a glance:
- Journey starting and ending place is: Lukla (via Kathmandu flight),
- Highest point on the trek: Kala Patthar (5,545 m) or Everest Base Camp (5,364 m)
- Overall distance: About 130 km round trip. Duration of the trek: 12 to 16 days
- Difficulty level: Moderate to challenging
- Best months to do the trek: March to May and September to November
Where Is Everest Base Camp Located?
There's no real village at Everest Base Camp. It's tucked in the Khumbu region of northeastern Nepal, inside Sagarmatha National Park. The base is right below the Khumbu Icefall - the first big wall that climbers have to cross. Now, it doesn't stay built all year.
During spring and autumn, it becomes a giant tent city, with teams from everywhere setting up for months. The thing is, when the seasons change, it empties out completely. Standing there outside, climbing season feels quiet and kind of overwhelming.
People often mix it up with Tibet's North Everest Base Camp, which sits on the opposite side at a similar height. Most visitors go to the Nepal (South) Everest Base Camp instead, accessed via Lukla and the Khumbu Valley.
Why Choose the Everest Base Camp Trek?
People pick this trek for reasons that go far beyond the mountain. It's doable without climbing skills or gear. You just need to walk five to seven hours a day, consistently. Thing is, the culture feels real. Sherpas live with their monasteries, traditions, and open arms.
That depth isn't found elsewhere. The views shift daily - valleys one day, icy plains the next. More or less, no two days are alike. Standing at base camp, Everest looming overhead, gives a quiet kind of pride. Nepal handles trekkers well. Trails are clear, teahouses dot the route, and locals know how to help.
Everest Base Camp Trek Route Overview
The traditional route for the Everest Base Camp trek follows a frequently traveled path through the Khumbu valley. Generally, trekkers take a flight to Lukla and walk north, passing through several villages and gaining elevation until reaching base camp, after which they retrace their steps on the return.
The broad route looks like this:
Kathmandu > Lukla > Phakding > Namche Bazaar > Tengboche > Dingboche > Lobuche > Gorak Shep > Everest Base Camp > Kala Patthar > Return to Lukla
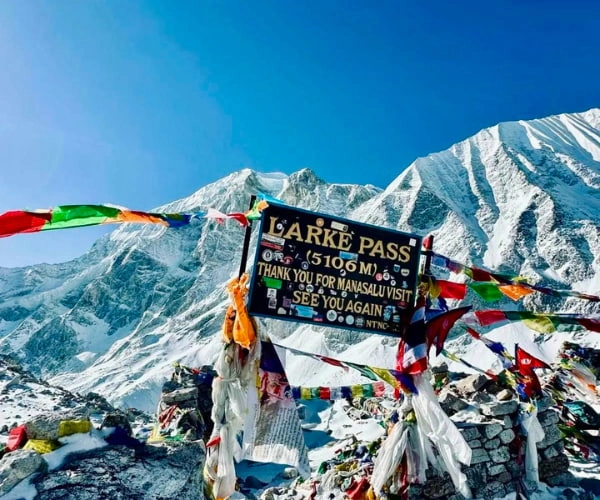
While some trekkers incorporate a side trip to Everest with a visit to Gokyo Lakes or a crossing of the Everest Cho La Pass for a more challenging variation, beginners are best advised to stick to the classic route as their first experience.
Key Stops Along the Trek Route
Each village along the route is unique and plays a different part in the trek.
Lukla (2,860 m): Your first step. Tenzing-Hillary Airport in Lukla is infamous as one of the most dangerous airports in the world to land at. The bustle of Lukla sets the mood for the adventurous journey ahead.
Phakding (2,610 m): A short first-day trek from Lukla. The terrain is very gentle, allowing a good leg warm-up.
Namche Bazaar (3,440 m): The main center of the Khumbu region. This is where most trekkers take an acclimatization day or two. Besides this, there is good food, nice clothing and gear shops, and amazing mountain views.
Tengboche (3,860 m): Contains the well-known Tengboche Monastery, the largest monastery in Khumbu. The panorama of Everest, Nuptse, and Ama Dablam from here is simply incomparable.
Dingboche (4,410 m): Yet another acclimatization stop. On the rest day here, many trekkers opt for the short hike to the top of Nagarjun Hill (5,100 m).
Lobuche (4,940 m): A very small settlement located below the Khumbu Glacier. The cold during the night can be extreme.
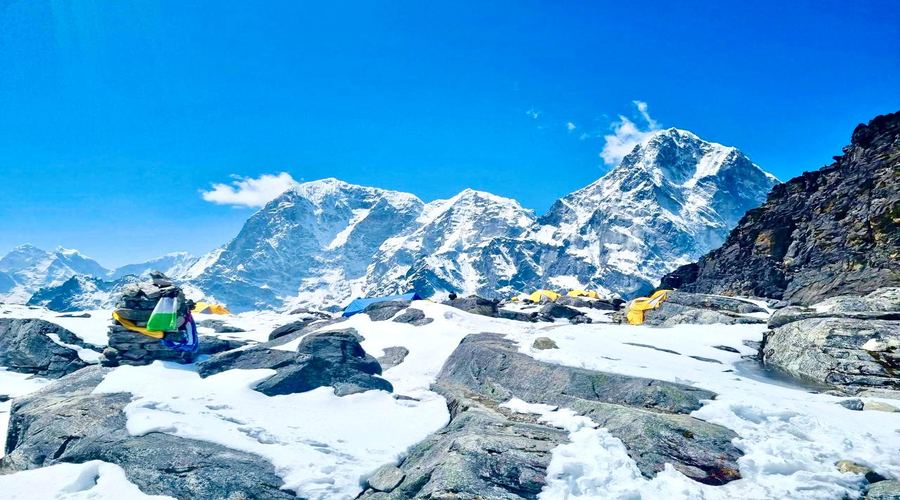
Gorak Shep (5,164 m): The last teahouse stop before base camp. Most trekkers sleep here and do an early morning push to base camp or Kala Patthar.
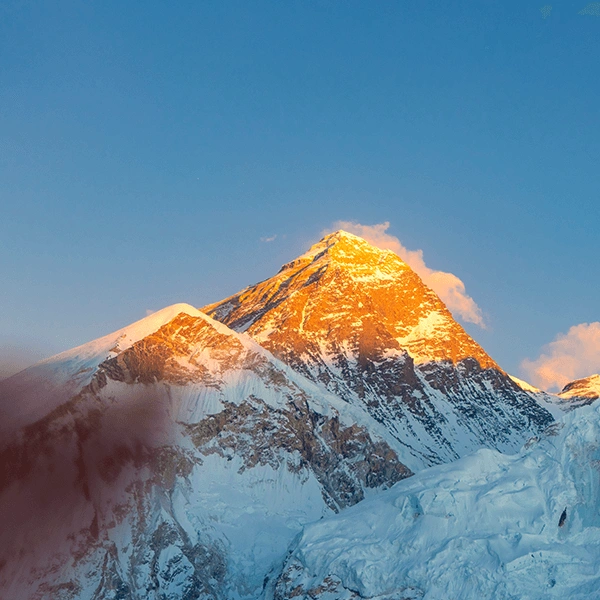
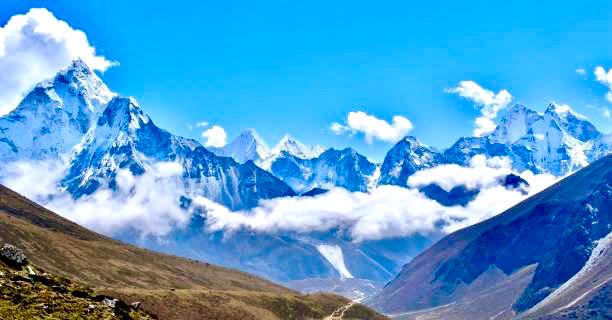
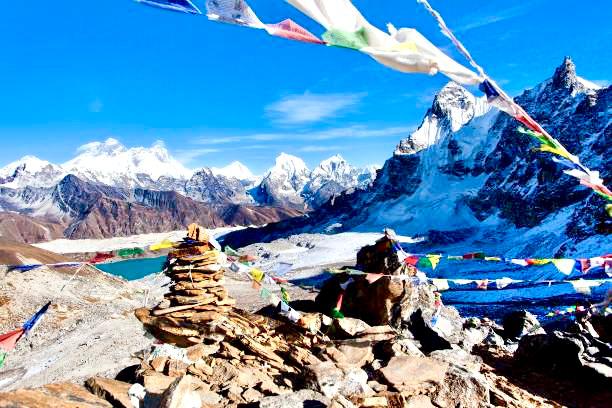
Everest Base Camp (5,364 m): Where the journey ends. Relax here. The view of the Khumbu Icefall will stay with you forever.
Kala Patthar (5,545 m): For many trekkers, this is a major highlight. You get a higher viewpoint and a direct, clear view of Everest's south face.
Lukla Flight and Trek Starting Point
Reaching Lukla is an adventure. The flights start from Kathmandu's Tribhuvan International Airport (sometimes also from Manthali Airport in Ramechhap to decrease congestion) and take about 30 to 40 minutes.
A few things to know about the Lukla flight:
- The weather will determine whether the flight goes ahead. Delays and cancellations are common, particularly during the monsoon season.
- In fact, a safe approach would be to always plan for a buffer day or two for your trip in case of flight interruptions.
- The runway at Lukla is not only short but also uphill. The whole thing is quite an exciting experience.
- It's safe too, and the experienced local pilots operate the flights there daily.
- Most flights depart early morning. You may want to organize your trekking gear the day before.
- Some hikers decide to travel by car and walk from Salleri or Phaplu as a different starting point. However, this will add several days to the trip and is much less common.
Everest Base Camp Trek Detailed Itinerary
We offer a detailed day-by-day itinerary for seamless planning. Prefer a custom route? Feel free to contact us!
Day 1: Arrival in Kathmandu (1,400m)
Welcome to the Himalayan Nation! You will be received at the airport and transferred to the agreed hotel. All the trip details will be discussed and finalized. You will be introduced to your trekking guide, and you will be assisted if you need last-minute shopping before the trek. The welcome dinner will be served in a Nepalese restaurant. Overnight in a hotel
Day 2: Fly Kathmandu to Lukla (2,840m) & Trek to Phakding (2,610m)3–4 hours
Early in the morning, we will board a flight to the Tenzing-Hillary Airport in Lukla. The flight is about 25 to 30 minutes. Please note that the flight departs from Manthali Airport, Ramechhap, rather than Kathmandu Airport, to avoid the peak trekking season. Therefore, you may have to take 3 to 4 hours of road trip to Ramechhap before flying to Lukla. Upon reaching Lukla, you will meet the rest of the crew members and continue the trek after a brief tea or coffee break. We will obtain the Pasang Lhamu Rural Municipality Entry permit and then continue our trek through terraced farmlands, hamlets, and lush green forests. There are many Mani Wheels and Prayer flags along the way, including suspension bridges. The trail is well trodden, and you can have a gentle warm-up walk on this day. Overnight in a tea house
Day 3: Trek from Phakding (2,610m) to Namche Bazaar (3,440m), 6–7 hours
Today is a long day of trekking. We will walk along the banks of the Dudhkoshi River, crossing more than 4 suspension bridges. At Jorsalle, we will get the Sagarmatha National Park entrance permit and then have lunch. Upon reaching the Hillary Twin Bridge at the confluence of the Imja and Dudhkoshi Rivers, we will begin the uphill trek through lush, green forests of rhododendron and pine. The first sight of Mt. Everest is seen for the first time a few meters before reaching Namche Bazaar if the weather is clear. We will rest in our tea house in the evening, or you can stroll around the marketplace. Overnight in a tea house
Day 4: Acclimatization Day at Namche Bazaar (3,440m)3–4 hours
The first acclimatization is today! Early in the morning, after breakfast, we will hike to the Park situated above Namche Bazaar. The view you see from the park is so astounding and breathtaking. We get to see the scenery of mountains like Tabuche, Nuptse, Lhotse, Everest, Amadablam, Thamserku, Kangtega, Kusum Kangaru, Kwangde, etc. After spending some time in the park, we will begin trekking uphill to the Everest View Hotel. The trail is completely uphill through short bushes and grassy meadows. We will stop for a while in the Syangboche Airport and then head towards the hotel. Enjoying the sip of coffee from the balcony of the hotel and enjoying the panoramic scene of the Khumbu Himalayas is so cherishing. If time permits, we will visit the Khumjung Village as well. We will return to the Namche Bazaar and rest. Overnight in a hotel
Day 5: Trek from Namche Bazaar (3,440m) to Tengboche (3,860m), 5–6 hours
After breakfast, we will start the walking trip to Tengboche. At first, we will walk on the gentle Nepalese flat trail until Kyangjuma. The trail then descends down to Phungi Thanga, where we will have lunch and then continue the uphill trekking to Tengboche through green, lush forest. Our permit will be checked at the check post and then we will continue the uphill trail. Upon reaching, we will visit the Tengboche Monastery and attend the evening prayers. The sight of the Dudhkoshi Valley, Pangboche Valley, Everest, and Amadablam looks spectacular from this place. Overnight in a tea house
Day 6: Trek from Tengboche (3,860m) to Dingboche (4,410m), 5–6 hours
We will begin our trek after breakfast. Our journey heads downhill to Debuche Village, and after crossing the Imja River, we will enter the beautiful Pangboche Village. On the way to Dingboche, we will have lunch either in Pangboche or in Somare village. The landscape and vegetation drastically change from this place onwards. We will start to see scarce vegetation and barren glaciers everywhere. The village of Dingboche is the last densely populated village on the Everest Base Camp Trekking route. Overnight in a tea house
Day 7: Acclimatization Day at Dingboche (4,410m)3–4 hours
The second acclimatization takes place today. We will climb the Nagarshan Hill (5100 m) for acclimatization purposes after breakfast. The entire activity takes about 3 to 4 hours of time. We can enjoy spectacular views of the landscape and mountains from the top of Nagarshan Hill. It is an important activity as it helps us to prepare ourselves for staying overnight in places like Lobuche and Gorakshep. In the evening, you can stroll around the village and interact with the locals or simply sightseeing and observing the bustling village full of locals, trekking guides, trekkers, and porters. Overnight in a tea house
Day 8: Trek from Dingboche (4,410m) to Lobuche (4,940m), 5–6 hours
On the way to Lobuche, we will walk on a gentle slope through the grassy meadows until we reach Thukla Village, where we will have our lunch. After lunch, the trail is uphill to the Thukla Pass Memorial. We will take a look at the memorials erected for those who perished while climbing Everest. The trail is then becomes rugged and full of pebbles and boulders. We will walk along the banks of the river and reach Lobuche. Overnight in a tea house
Day 9: Trek from Lobuche (4,940m) to Gorakshep (5,164m) & Visit Everest Base Camp (5,364m); 7–8 hours
The most difficult section to walk due to the rugged trail is today. We will have to walk through the glacier and the big boulders. Make sure that you are together with your trekking guide all the time, as the trail through the moraine and glacier can be confusing, as it keeps changing. After walking for about 2 hours from Lobuche, we will reach Gorakshep, where we will have lunch and prepare our final push to the Everest Base Camp. The journey is challenging due to the rugged trail, but the final destination pushes us with full motivation. Finally, we will reach the Everest Base Camp today. We will spend about half an hour at the Everest Base Camp before retracing the same trail back to Gorakshep. Overnight in a tea house
Day 10: Hike to Kala Patthar (5,545m) & Trek to Pheriche (4,371m); 6–7 hours
Early in the morning, before dawn, we will begin to climb to the top of the Kalapathar. It is optional, but we recommend that you do this hike to get the mesmerizing sunrise experiences from the summit of Mt. Everest. People believe that the best view of Everest and the Mahalangur Himalayan range looks spectacular from this place. After witnessing the best sunrise, we will head back to Gorakshep for breakfast and continue the journey back to Pheriche via Lobuche and Thukla. Overnight in a tea house
Day 11: Trek from Pheriche (4,371m) to Namche Bazaar (3,440m); 6–7 hours
After breakfast, we will trek downhill and meet the original Everest Base Camp Trek route. We will then retrace the same trail back to Namche Bazaar via Tengboche and Kyangjuma. Overnight in a tea house
Day 12: Trek from Namche Bazaar (3,440m) to Lukla (2,840m); 6–7 hours
We will retrace the same trail back to Lukla. In the evening, we will celebrate with the trekking crew members after the successful journey of the Everest Base Camp Trek. Overnight in a tea house
Day 13: Fly from Lukla to Kathmandu (1,400m)
We will take the early morning flight to Kathmandu or Manthali. Upon reaching Kathmandu, the company representative will host the farewell dinner and review about the trip. Overnight in a hotel
Day 14: Final Departure from Kathmandu
Finally, our airport representative will take you to the airport and bid you farewell with the promise to meet again for yet another adventure in Nepal.
Cost Details
What’s Included
- Sagarmatha National Park entry permit
- 3 nights’ accommodation in Kathmandu on a bed and breakfast basis.
- Kathmandu sightseeing with a private guide and private transportation
- Khumbu Pasang Lhamu / rural municipality permit & TIMS card
- Domestic flights (Kathmandu-Lukla) with airport taxes
- Airport arrival and departure transfers in Kathmandu
- All ground transportation as per the itinerary
- Government-licensed English-speaking trekking guide
- Porter(s) to carry luggage (wages, food, and insurance included)
- Tea-house / lodge accommodation during the trek (twin sharing)
- Meals during the trek (typically breakfast, lunch, and dinner)
- Basic first-aid kit and medical supplies carried by the guide
- Trekking gear on loan (e.g., down jacket, sleeping bag) in some packages
- Government and local taxes/service charges
What’s Not Included
- International airfare to/from Nepal
- Nepal entry visa fee
- Meals in Kathmandu (unless specified)
- Bottled water, beverages, hot drinks, and alcohol
- Travel insurance (including helicopter evacuation and emergency coverage)
- Personal trekking gear (boots, poles, clothing)
- Tips/gratuities for guide(s), porter(s), and drivers
- Hot showers, Wi-Fi, and battery charging fees during the trek
- Laundry, phone calls, snacks, and extra menu items
- Extra porter(s) or additional services beyond the package
- Additional accommodation due to delays (weather, flight delays)
- Emergency evacuation costs are not covered by insurance
- Unforeseen costs due to itinerary changes (strikes, natural events)
Total Distance and Trek Duration
The round-trip from Lukla to Everest Base Camp is about 130 km. With the Kala Patthar detour, it climbs to around 140 km.
Most trekkers spend 12 to 16 days completing the route. Rushing it can lead to serious altitude sickness, even for fit people. The body needs time to adjust, and rest days aren't just helpful - they're necessary. Daily hikes cover 8 to 16 kilometers.
That pace feels slower than usual hiking. The high elevation and rugged paths make every step more demanding than maps suggest. Altitude sickness doesn't follow fitness levels or training schedules. Proper acclimatization happens gradually, not suddenly.
Altitude Profile and Elevation Gain
The climb in elevation happens gradually on this walk, giving your body time to get used to it. Here's a very simple illustration:
Location. Elevation
Kathmandu 1,400 m
Lukla 2,860 m
Namche Bazaar 3,440 m
Tengboche 3,860 m
Dingboche 4,410 m
Lobuche 4,940 m
Gorak Shep 5,164 m
Everest Base Camp 5,364 m
Kala Patthar 5,545 m
Walking altitude increases slowly on the Everest base camp hike, so the body has time to adapt. A quick overview:
Difficulty Level for BeginnersThe
The Everest Base Camp trek is classified as moderate to difficult. If more or less untrained people hear "challenging, " they may get scared. However, it is necessary to understand what the degree of difficulty really means on this path.
The difficulty comes from three main factors:
Altitude. At high altitudes, the body requires time to adapt to a reduced oxygen supply. Actually, this is the biggest cause of discomfort among people, far more than the physical landscape.
Duration. Normally, hiking 5 to 7 hrs daily for almost 2 wks is very exhausting. Accumulated weariness is a genuine thing.
Terrain. The path is mainly rocky and uneven in many places. There are sections with glacial moraine, suspension bridges, and stone paths.
What makes it manageable:
- The path is clearly marked, and over the years, thousands of people have followed this route.
- Teahouses offer lodging and food at intervals of 1-3 hours of walking.
- You can set a pace that suits you exactly.
- Guides and porters lessen your concern about organising things.
The physical effort required is substantive, but not a mountain limit. Every year, hundreds of senior citizens aged 50-60 successfully make this journey.
How Fit Do You Need to Be
You don't have to be a professional athlete, but you still require a decent level of fitness to go.
So, some months before your trip, concentrate on:
- Walking and hiking. Work up slowly until you can walk for 4-6 hours with a light pack on your back. Try, as much as possible, to include the ups and downs of the hills.
- Stairs climbing. Legs and lungs prep exercises.
- Cardio fitness. Running, cycling, and swimming are excellent ways to gradually increase your aerobic base, among other benefits.
- Core strength. A strong core not only improves your balance on uneven terrain but also prevents you from getting a tired back.
Being able to hike for 5 hours over hills while comfortably carrying a 5-7 kg backpack is a good indication of your fitness level for the trek.
Best Time to Do the Everest Base Camp Trek
Nepal has two trekking seasons, and both offer great times to trek to Everest Base Camp.
Spring (March to May) is usually considered the best season. During this time, the days are comfortably warm, visibility is very high most of the time, and the rhododendron forests soak the landscape with bursts of red and pink. Beyond that, spring is when Everest is climbed the most, turning the base camp into a hub full of expedition teams and full of life.
Autumn (September to November) is just as good and quite possibly even better for seeing the clearest skies, especially in October and November when the air is the cleanest after the monsoon. The temperature is definitely lower than in spring, especially in the evening, but the views are stunning.
Winter (December to February) is a season of cold and isolation. The trail is much less busy, which is just the way some people like it. Snow can fall on the high passes, and nighttime temperatures in the higher altitudes can plunge far below zero. Beginners should probably avoid this season.
Monsoon (June to August) is the season when most people get dissuaded from trekking. Not only do the rains come down in torrents, making the paths muddy and slippery, but leeches also appear in the lower stretches, and the cloud cover keeps the mountain views hidden for most of the day.
Weather Conditions by Season
Knowing what to expect in the weather lets you pack right and avoid surprises.
- Spring: days go from 10C to 20C at lower levels, but drop to -5C to -15C at night near Gorak Shep. Afternoon clouds appear, and snow flurries occur above 4,500 meters.
- Autumn: brings cooler air and less moisture. Morning skies are often clear. By November, nights in Gorak Shep can fall below -15C. In Namche,
- winter sees daytime highs between 0 °C and 5 °C. At Gorak Shep, the sun barely reaches -10C during the day. Nights there get extreme.
- Monsoon: Warm and very wet. Landslides can occasionally block trails.
Even in summer, layers that hold heat and keep water out are a must-have. The weather shifts quickly in the Himalayas, often without warning. Always bring gear that fits tightly against the skin and resists wind. Cold snaps can come fast when you are not looking.
Permits Required for Everest Base Camp Trek
You need two main permits to trek in this region:
1: Sagarmatha National Park Entry Permit. This is required for entry into the national park that covers the entire Everest trekking region. Cost: NPR 3,000 per person (about USD 22 to 25). It's issued in Kathmandu or at the Monjo park entrance.
2: The Khumbu Pasang Lhamu Rural Municipality Fee is a local government conservation charge collected at Lukla or Monjo. Cost: NPR 2,000 per person (roughly USD 15-17). Probably, both fees are necessary to enter the trekking zone.
You don't need a special climbing permit for the trek. Only those aiming to summit Everest require one. Keep physical copies of both permits with you at all times. Checkpoints along the route will verify them. If you're going with an agency, they usually get the permits sorted out. Always double-check before leaving.
Cost Breakdown for Beginners
Costs for an Everest Base Camp trek vary widely based on your preferences, travel style, and whether you go solo or with a group.
Here is a realistic breakdown:
Expense Estimated Cost (USD)
Return flights to Kathmandu USD 500 to 1,500 (varies by origin)
Kathmandu to Lukla flight (return). USD 200 to 260
Agency/guide/porter package USD 800 to 1,800
Permits USD 35 to 45
Teahouse accommodation USD 3 to 15 per night
Meals on trek USD 3 to 8 per meal
Travel insurance USD 80 to 200
Gear and equipment USD 200 to 600 (if buying)
Miscellaneous (tips, WiFi, snacks) USD 100 to 200
Total estimate for a 14-day trek: USD 1,500 to 4,500, depending on your choices.
Budget vs Luxury Trek Options
The Everest region has options for all types of travelers.
Budget trekking It is entirely feasible to do trekking on a tight budget. Simple teahouse rooms are priced at USD 3 to 8 per night, and the meals are basic but satisfying: dal, bhat, noodles, eggs, and porridge. Budget trekkers generally allocate USD 25 to 40 per day for their stay and food during the trek.
Mid-range trekking means better rooms (in many cases, lower-elevation rooms are en-suite), a trustworthy guide, and a larger food selection. Budget about USD 50 to 80 per day on the trail.
Luxury trekking is mostly done at the same lodges operated by the Yeti Mountain Home chain, which offer amenities such as heated rooms, hot showers, comfortable beds, and restaurant-level food. Their prices range from USD 80 to 200 per night, and they can still be found as far as Kongde and Namche. However, above Dingboche, luxury options become nearly nonexistent, no matter one's budget.
The truthful advice for newbies in trekking: it is better to spend more money on a competent guide than on accommodation. An experienced guide is the one who can actually help you the most throughout your trek. A fancy room cannot.
Accommodation on the Everest Base Camp Trek
Accommodation on the Trek
Teahouses run the Khumbu trek. Family-owned guesthouses offer a simple room and meals. In Namche, they feel cozy. At Gorak Shep, you're in a cold bunk room with strangers.
What's really going on there?
- Rooms are twin-share, one bed, thin mattress.
- Blankets come, but you should bring a sleeping bag above 4,000 m.
- Bathrooms are shared, in particular beyond Namche.
- Hot showers, bucket or electric - cost $2 to $5. Electricity works, but is limited. Charging gear runs $1 to $3 per device.
- WiFi is available in most places, but it slows down and drops above Namche.
Booking happens early in peak seasons, like October. Top teahouses sell out quickly.
Food and Drinking Water Options
The food on this trek is simple but surprisingly good in most teahouses.
Common menu items:
- Dal bhat (lentil soup with rice and vegetables). This is the best value meal on the trek.
- Noodle soup, pasta, fried rice, and porridge with pancakes, eggs for breakfast
- Garlic soup (widely believed to help with altitude),
- Snickers, biscuits, and dried fruit are available at shops along the trail
Prices go up as you climb. A meal that costs USD 5 in Lukla might reach USD 10 to 20 in Gorak Shep. It seems altitude affects not just breathing. The cost of food, too, is hard to ignore. One bite of dal bhat can feel like a full day's worth of comfort. That's what travelers rely on when they're far from home and have no other choice
Drinking water:
Through-hiking a large mountain requires you to strategically plan your water intake. Generally, do not drink water directly from the tap or streams without proper sanitization. Possible choices:
- Bottled water (you can buy it, but it's really costly and generates waste at high altitude)
- Boiled water from teahouses (this is not only the best option but also the cheapest) -
- Water purification tablets or a water filter like Sawyer Squeeze or LifeStraw.
- UV sterilizers, e. g., SteriPen, can also be very effective.
One of the most effective ways to combat altitude sickness is to keep yourself constantly hydrated. When at altitudes above 3,500 meters, try to drink a minimum of 3 to 4 liters of water daily.
Packing List for Beginners
Packing right can make a huge difference. Carrying a very heavy load will make you suffer. On the other hand, if you pack very light you might end up being cold and unprepared.
Clothing:
- Moisture-wicking base layers (2 to 3 sets)
- Insulating mid-layer (fleece or down jacket)
- Waterproof and windproof outer shell jacket and pants
- Trekking pants (2 pairs)
- Thermal leggings
- Wool or synthetic trekking socks (5 to 6 pairs)
- Warm hat, sun hat, neck gaiter, gloves and liner gloves
- Gaiters (optional but helpful in snow)
Footwear:
- Waterproof trekking boots with ankle support (must be broken in before the trek)
- Camp sandals or lightweight shoes for teahouses
Gear:
- 50 to 60L trekking backpack (or smaller daypack if using a porter)
- Sleeping bag rated to at least -15°C
- Trekking poles (essential for descent)
- Headlamp with extra batteries
- Sunglasses (UV400 or better)
- Sunscreen SPF 50+, lip balm with SPF
Health and hygiene:
- Personal first aid kit
- Diamox (acetazolamide) for altitude sickness prevention (consult your doctor)
- Hand sanitizer
- Wet wipes
- Toilet paper (teahouses sometimes run out)
- Prescription medications
Electronics:
- Camera or phone
- Power bank (at least 20,000 mAh)
- Universal adapter for Kathmandu hotel
Essential Gear and Equipment
However, a handful of items are worth mentioning, especially because some are so frequently forgotten and others deeply affect your comfort level.
Sleeping bag: Above 4,500 m, teahouse blankets are not always warm enough. A good sleeping bag that can withstand temperatures as low as -15 °C is absolutely worth it.
Trekking poles: They can lessen the stress on your knees by up to 25% during descents. Beginners often decide not to carry them. Don't be one of them! Your knees will be thanking you at day 11.
Headlamp: The power can go out sometimes. Starting early in the morning to Kala Patthar is a walk done in the dark. Always have a headlamp and, if possible, carry spare batteries.
Buff or neck gaiter: It is a great protection against the cold wind, dust, and sun on the exposed ridges.
Altitude medication: Diamox (acetazolamide) is the drug mainly prescribed to help with acclimatization. Consult your doctor at least 4 weeks before departure. Learn the dosage and side effects.
Altitude Sickness and Prevention Tips
Acute mountain sickness (AMS) is the main hazard of this expedition. It doesn't discriminate between highly fit and unfit people and can become life-threatening if overlooked.
Symptoms of AMS:
- Headache (most frequent initial symptom)
- Nausea and decreased appetite
- Feeling light-headed and tired
- Having trouble sleeping
- In extreme situations: disorientation, unsteadiness, coughing up blood-tinged sputum.
Prevention tips:
- Stick to the "climb high, sleep low" method. Go up for a couple of hours during the day and spend the night at the lower campsite.
- Do not climb more than 500 m daily over 3,500 m.
- Drink 3 to 4 liters of water every day.
- Stay away from alcoholic drinks for the first few days at the altitude.
- Walk at a slow pace. Pole-pole, as they say on Kilimanjaro.
- The same is true here. Use your acclimatization days wisely. Not skipping them.
If you develop symptoms:
Do not climb higher if they have not reached a solution. If symptoms become more severe, descend without delay. It is absolutely fine, and there is no shame in having to turn back in a situation like this. The mountain that you have been attempting will still be there next year. This is the golden rule of high-altitude trekking.
Acclimatization Tips for Safe Trekking
Good acclimatization is literally a matter that, to a great extent, separates a successful trek from a medical evacuation.
The common prescription is not to increase your sleeping altitude by more than 500m per day above 3,000m, and to take a day off for every 1,000m of vertical gain above that. The schedule presented in this manual follows this basic principle.
Practical tips:
- On acclimatization days, don't stay in bed. Head out for a short hike, two to three hours. Movement helps.
- If you're short of breath at night, sleep with your head slightly raised.
- Eat even if your appetite is gone. Your body burns more calories up high.
- Avoid sleeping pills and sedatives - they can suppress breathing, which is dangerous at altitude.
- Tell your guide right away if you start feeling off. Don't push through it alone.
Mild AMS usually goes away with rest and hydration at the same elevation. Severe cases need a descent. Helicopter evacuation in the Khumbu area is available but costs $3,000 to $5,000 and requires solid travel insurance - hard to ignore if you aren't prepared.
Travel Insurance for the Everest Region
This is not optional. Travel insurance that covers high-altitude trekking and helicopter evacuation is essential for anyone doing this trek.
Look for a policy that covers:
- Trekking to at least 6,000 m elevation
- Emergency helicopter rescue and evacuation
- Medical expenses abroad (minimum USD 100,000)
- Trip cancellation and delay
- Lost or stolen gear
The policy should list what's included and what's not. Elevation limits are often misunderstood. Read the fine print before signing up. Without this, you are risking serious harm on a remote trek.
True Traveller offers solid options for himalayan routes. Battleface focuses on high-risk environments. World Nomads has broad coverage but may exclude certain altitudes. IATI is known for strict terms but includes detailed medical support.
Hiring a Guide or Porter
Beginners should hire a guide - Mainly if they're unsure of the trail.
Guide:
- Leads the trail, handles navigation
- Monitors your health and watches for altitude sickness signs
- Communicates with teahouse owners (Nepali/Sherpa language)
- Provides cultural context and history along the way
- Handles emergencies and logistics
Cost runs $25 to $40 daily. Tip at the end, usually 10-15% of the full amount.
That's about what most hikers pay for solid support on the route, no exceptions for new climbers.
Porter:
- Carries your main pack (usually up to 15 kg per porter)
- Allows you to trek with only a small daypack
- Frees your physical and mental energy for the experience
Porter cost: USD 15-25 per day. Also, a tip at the end.
Many trekkers pick one guide and one porter. Some agencies bundle both into the price. Holy Kailash Tours includes experienced English-speaking guides and dependable porters by default. Safety rules and acclimatization plans get full attention.
Solo Trek vs Guided Trek
Solo trekking is allowed for foreigners, but it's not simple. Beginners should go with a guide - at least once. Local insight, safety checks, and backup help are worth the cost.
Advantages of going solo:
- More flexible schedule
- Lower daily cost (no guide/porter fees)
- Complete freedom on the trail
Disadvantages:
- Navigation errors can happen (rare but possible)
- No one recognizes the early signs of AMS
- Tougher to handle emergencies alone
- Missing out on local knowledge and cultural insight
- Teahouse bookings can be harder without a Nepali-speaking contact
Recommended for beginners: You can try it alone on your second trip after you've seen the trail. And if you don't have a guide, you're on your own in the mountains. Proper planning takes time, particularly when the weather changes quickly. The trail can shift without warning; that's how unpredictable it gets.
Safety Tips for First-Time Trekkers
Safety on this trek comes down to a few common-sense principles.
- Stick to the itinerary: Rushing is the biggest cause of altitude problems.
- Tell someone your plan: Register your trek with the nearest TIMS (Trekker's Information Management System) checkpoint.
- Know the signs of AMS: review them before departure and share them with your group.
- Carry a basic first aid kit: painkillers, blister pads, rehydration salts, and altitude meds.
- Protect yourself from the sun: UV radiation is strong at high altitudes. Use SPF 50 sunscreen and UV-blocking sunglasses.
- Watch your footing: rocky trails, especially on descent, are the main cause of injuries. Use poles,
- Respect your body: move slowly, stay alert. If something feels off, speak up. Pride isn't worth a medical evacuation.
Communication and Internet on the Trek
Why does staying connected get tougher as you climb?
Mobile data: Mobile data from Ncell and Nepal Telecom works with SIM cards available at Kathmandu's Tribhuvan International Airport or city centers. Coverage holds okay up to Namche but fades above that.
WiFi: WiFi is available at most teahouses up to Gorak Shep, though speeds are slow and connections drop. Charges range from USD 1 to 5 per session.
Satellite communication: Some teahouses now run Starlink, offering much faster internet - but it still fails above 4,500 m.
For emergencies: your guide carries a phone and knows the right contacts. Helicopter evacuations in khumbu are coordinated quickly when needed. The system isn't perfect, but it handles urgent cases reliably.
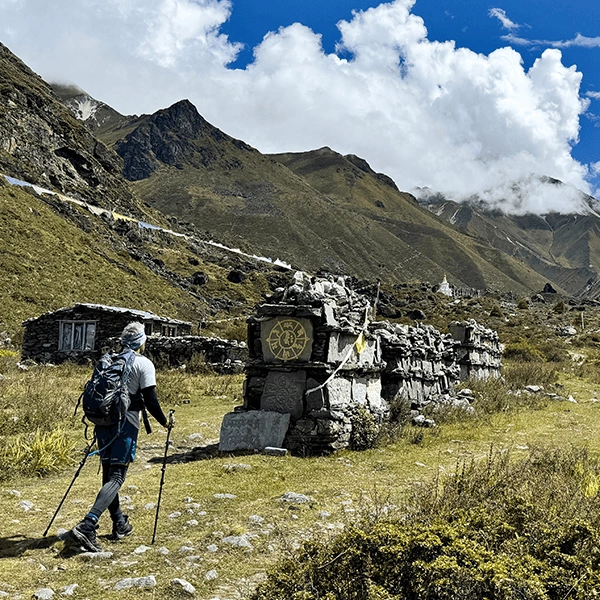
Cultural Experience in the Everest Region
The trek isn't just about climbing a mountain. Also, the Khumbu is home to the Sherpa people, one of the most resilient and fascinating communities in the world.
Things you will encounter:
Monasteries and gompas: Tengboche Monastery is the most well-known, but smaller prayer halls are scattered along the path. Remove your shoes and hats before stepping inside.
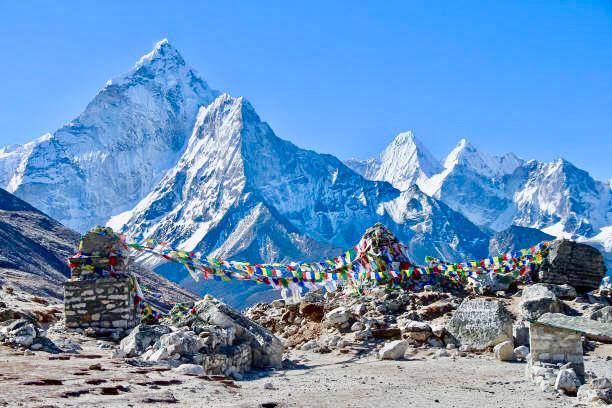
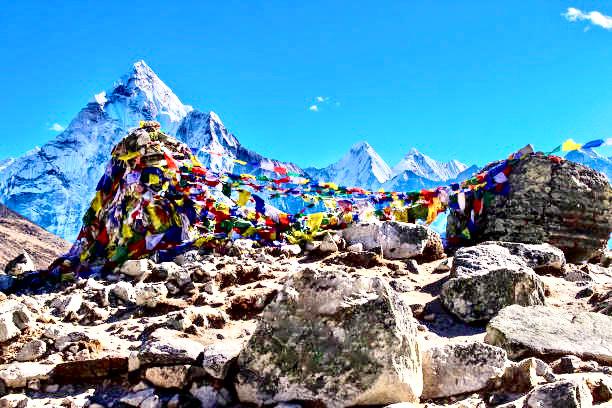
Mani walls and prayer stones: These are long rows of carved stone with Buddhist mantras. Always walk past them on the left side - clockwise.
Prayer flags: They hang across passes and bridges, carrying prayers into the wind. Don't touch or tear them down.
Yaks and dzo: These animals carry loads through the region. When a yak train moves by, step to the uphill side of the trail.
Sherpa festivals: If you're there during Mani Rimdu, usually in October or November at Tengboche, you'll probably witness a vibrant celebration.
Interacting respectfully with local traditions makes the trip more meaningful. Ask permission before taking photos of people, learn a few basic Nepali words, and always thank those who offer you food or shelter.
Responsible and Sustainable Trekking
The Everest region is already under significant environmental strain due to the rising number of trekkers. Your trail behavior is crucial in that sense.
- Firstly, do not throw garbage. Take your garbage with you. For example, most trekkers even carry a small bag for wrappers and waste.
- Stay away from single-use plastics. Carry a reusable water bottle and, instead of buying bottled water beyond Namche, purify your own water.
- Use only the marked toilet facilities. You should never relieve yourself near water sources or in ecologically vulnerable areas.
- Pay people fair wages. Ensure your guide and porter are paid adequately. The reason the industry standard exists is very obvious. Agencies that greatly undercut prices generally do so to the detriment of their staff.
- Support local businesses by working only with local people, such as buying goods and eating at local spots.
- Follow only marked trails. Because of damage to vegetation and erosion, cutting corners is prohibited. Stick to the path.
The mountains are the heritage of all future trekkers, too. Leave them better than you found them.
Final Tips for a Successful Everest Base Camp Trek
Here are a few pointers that might come in handy to you when preparing for your trek:
- Start training at least 3 months before your departure.
- Completely break in your hiking boots way ahead of the trip. Don't begin your trek wearing new boots. Bring as many socks as you can fit in your luggage.
- Do not worry about packing light at the expense of warmth. Every single kilogram you carry will count at high altitude.
- Be prepared for the trek. There will be challenging days, the nights will be cold, and the occasional breathtaking views will come your way.
- All the hardships combined will be totally worth it. Follow your guide's lead. They have been here many times.
- Heed their advice on pacing, drinking sufficient water, and overall health. Do take pictures, but also put the camera down sometimes.
- Enjoy the moment. The memory of your time at base camp will be more vivid than any photograph. Reserve some free days in your itinerary. The weather may cause delays.
- Changes in plans will happen. Being flexible will keep you from stressing out.
- Try to learn some basic Nepali expressions. " Nice to meet you" (Namaste), "Thank you" (Dhanyabad), and "Slow down" (Bistari bistari) will be very helpful.
Final Thoughts and Call to Action
The Everest Base Camp trek changes people. It doesn't just happen - you feel it in your bones. You push past fear, then silence creeps in the mountain watches. It doesn't rush you. You learn what your body can do when you move slowly, stay patient, and trust the path.
Beginners think it's too hard at first. They see steep slopes, cold air, and long days, and think they'll never make it. But with proper training, a good guide, and time to adjust to the altitude, most people reach base camp.
A local operator handles everything: permits, gear, lodging, and daily maps. No one has to figure out the details on their own. At Holy Kailash Tours, we take care of logistics so you don't have to worry about them. Whether it's your first trek or a Kailash Mansarovar trip, our guides know the routes well.
We build acclimatization into every plan so you don't get sick or overwhelmed. Plus, we care about your safety as much as we do about the experience itself.
Book your Everest Base Camp trek with Holy Kailash Tours today and begin your Himalayan journey without stress.
Everest Base Camp Trek FAQs
1: How hard is the Everest Base Camp trek for new trekkers?
It is rated moderate to challenging, but beginners can make it with solid preparation. The biggest hurdle isn't technical climbing - it's altitude. If you can walk five to seven hours through hills, you've got the base fitness. Acclimatization and walking gradually matter more than natural athleticism.
2: How much does it cost?
Total expenses usually range from $1,500 to $4,500. That includes flights, permits, guide and porter fees, lodging, and meals. Tight budgets can stick near the bottom end. Guided trips with trusted agencies, comfortable teahouses, and full support push prices higher.
3: Do beginners need a guide?
Not legally required, but highly advised. A reliable guide checks your health, follows the trail, speaks local languages, and keeps you safe. For first-timers, just knowing things will go smoothly is enough to justify the fee.
4: What is the best time of year to do the Everest Base Camp trek?
Spring and autumn are the top seasons for the Everest Base Camp trek. March to May and September to November offer clear skies and stable temperatures. October stands out as the peak month for visibility and mild weather. Spring brings warmer days and blooming rhododendrons. Both times work well for most travelers.
5: Can I get altitude sickness on the Everest Base Camp trek?
Altitude sickness can happen at these elevations. It affects people no matter how fit they are. Acclimatizing slowly, drinking plenty of water, gradually building up to climbing, and spotting early signs help reduce the risk. Checking with a doctor about Diamox before going is wise.
6: How many days does the Everest Base Camp trek take?
The standard trek takes 12 to 14 days, including flights to and from Lukla. Adding time for Kala Patthar and weather delays brings the trip to about 16 days when you return to Kathmandu from Kathmandu.
7: What if I can't reach base camp?
It happens more than most think. Altitude sickness, bad weather, a fall, or just being too tired can force a retreat. That's okay. Some hikers see Kala Patthar as the real prize. The Khumbu valley journey still feels amazing even if you stop in Namche or Dingboche. The mountain doesn't move.
8: Do I need prior trekking experience?
Help from past hikes is useful but not needed. Fitness and readiness matter more. If you've never done a multi-day hike, go on a 2 to 3-day trek in the hills months ahead. That shows your body's limits and what needs work. Many new trekkers finish the Everest Base Camp route each season.
9: Can I go during winter?
December through February works, but risks are high for first-timers. Temperatures plunge above 4,000 meters. Some teahouses shut down. Snow makes trails treacherous and hard to walk on. Monsoon season, June to August, brings heavy rain, leeches, and foggy skies. Without solid mountain training, avoid those months. Stick to spring or autumn instead. They're safer for good reason.
10: What if I can't reach base camp?
That's not as rare as people believe. The thing is, altitude sickness, storms, or a slip can knock you off track. It's okay to turn back. Some hikers think Kala Patthar is the real goal. The Khumbu valley trip still feels great even if you stop in Namche or Dingboche. The mountain stays where it is, no changes.
11: Do I need prior experience?
Past hikes help, but aren't required. How ready are you physically? If you've never done a multi-day trek, go on a two- to three-day hike in the hills during the early months. That tells your body what it can and can't handle. Many new trekkers complete the Everest Base Camp route every year.
12: Can you go in winter?
December through February works - but dangers rise sharply for first-timers. Temperatures drop below 4,000 meters, and some teahouses close down. Snow covers the trails, making them slippery and hard to walk on. June through August brings heavy rain, leeches, and foggy skies. Without proper mountain training, skip those months. Stick with spring or autumn instead - they're safer for good reason.
13: Is there any risk in the Khumbu region during a trek?
There will always be one risk or the other, but in case of a medical emergency, the region has a relatively well-developed emergency response as compared to other remote trekking areas.
A health post in Pheriche (which doctors volunteer during trekking season) and a small medical facility in Namche are places where you can get medical help. For life-threatening cases, getting a helicopter evacuation is the best option, and most of the time, it can be arranged in a few hours if the weather is good.
Therefore, travel insurance is a must that covers the helicopter evacuation. The rescue call will be coordinated by your guide. You should remain calm, do as they say, and, if the situation requires it, descend as quickly as possible without putting your safety at risk.